How to harvest Amazon search terms into keywords
Set up a keyword harvest rule in RedHen Labs: source and destination campaigns, the negative in the source, harvest criteria, the schedule, and approving it.
A keyword harvest rule finds the searches that are already selling for you in campaigns you choose, usually your auto and broad ones, and adds them as keywords to the campaigns you name, where you can bid on them directly. It can also block the same search back in the campaign it came from, so the two don't compete. You approve each harvest, or let the rule apply them itself.
This guide builds one rule from start to finish, with a screenshot of each step (the control to use is ringed and numbered). It takes about five minutes.
Step 1 · Open the Keyword Harvest tab
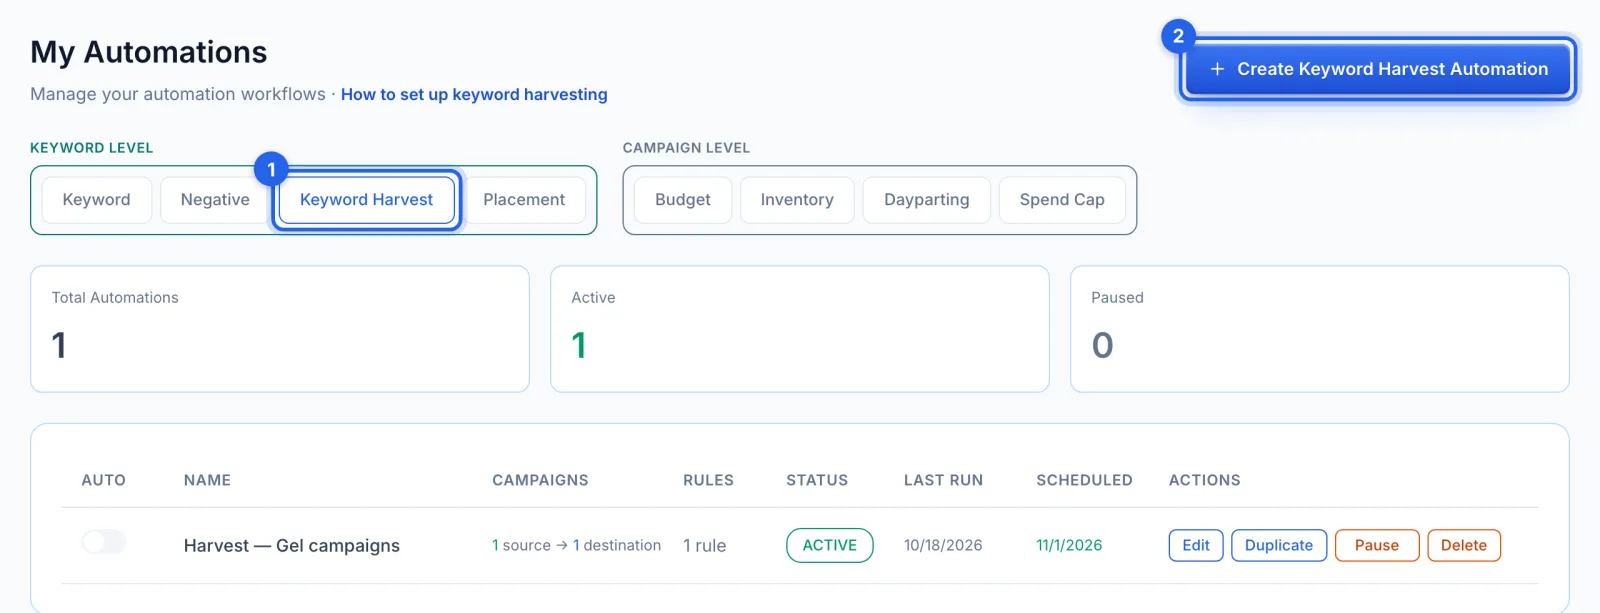
In the side menu, under Automation, click Automations (Professional plan). Open the Keyword Harvest tab (1) and click Create Keyword Harvest Automation (2).
Step 2 · Name it and pick the source campaigns
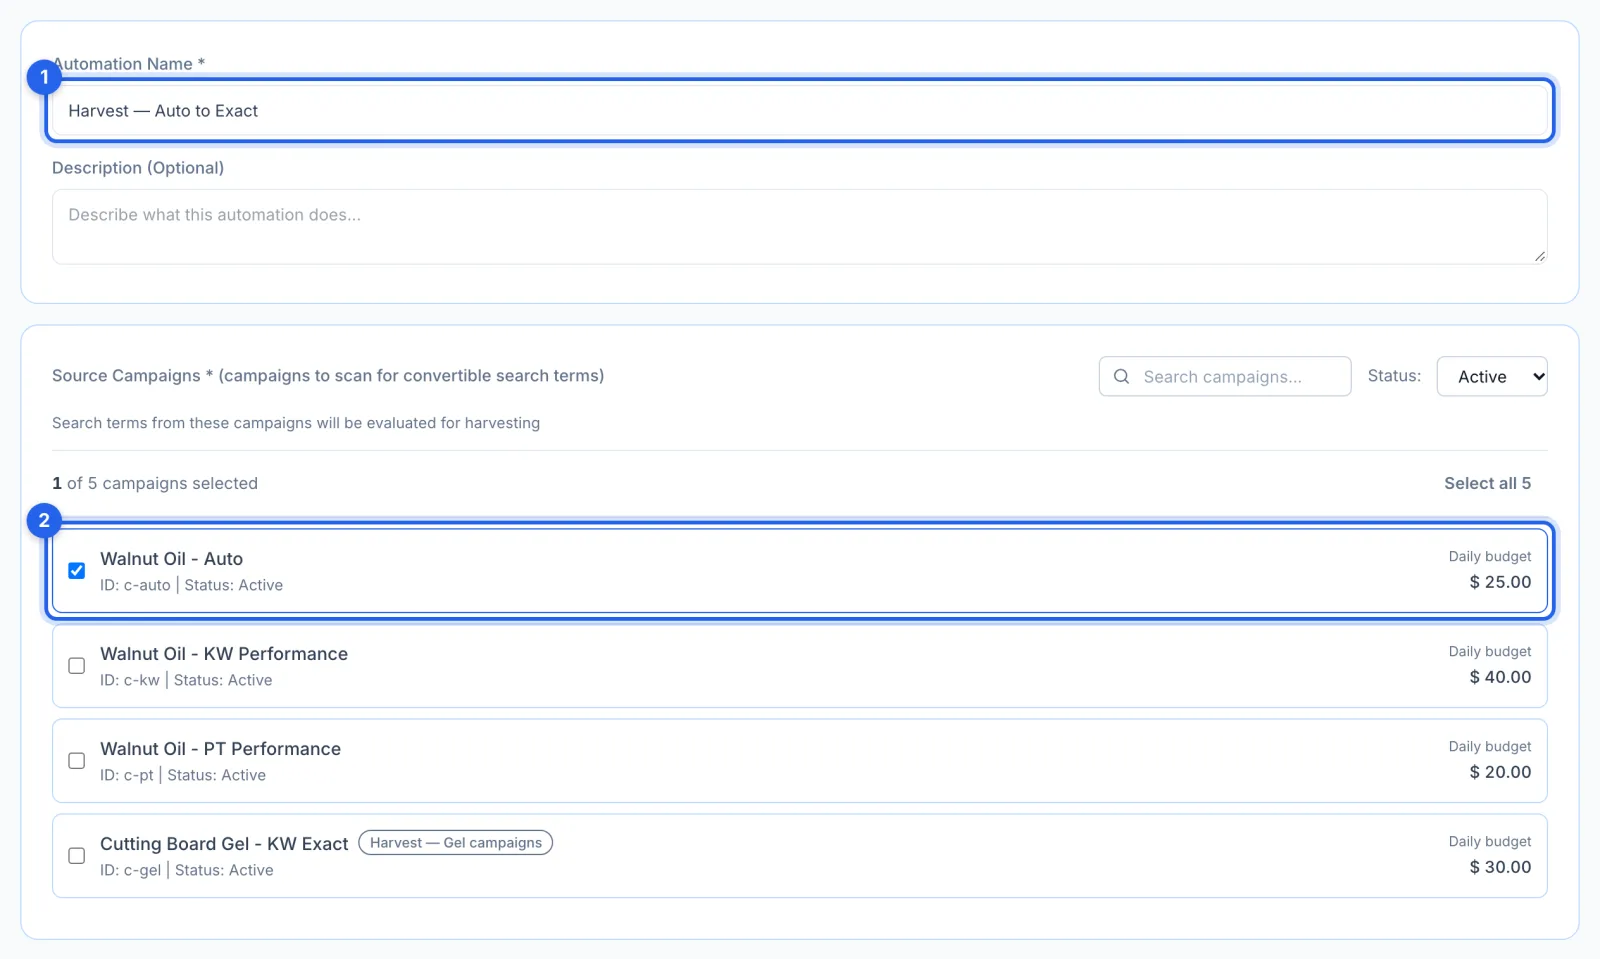
Name the rule (1) and tick the source campaigns (2): the campaigns whose search terms it checks, usually your auto and broad campaigns. A campaign another harvest rule already uses shows that rule's name.
Step 3 · Negate it in the source, and check the fallback bid
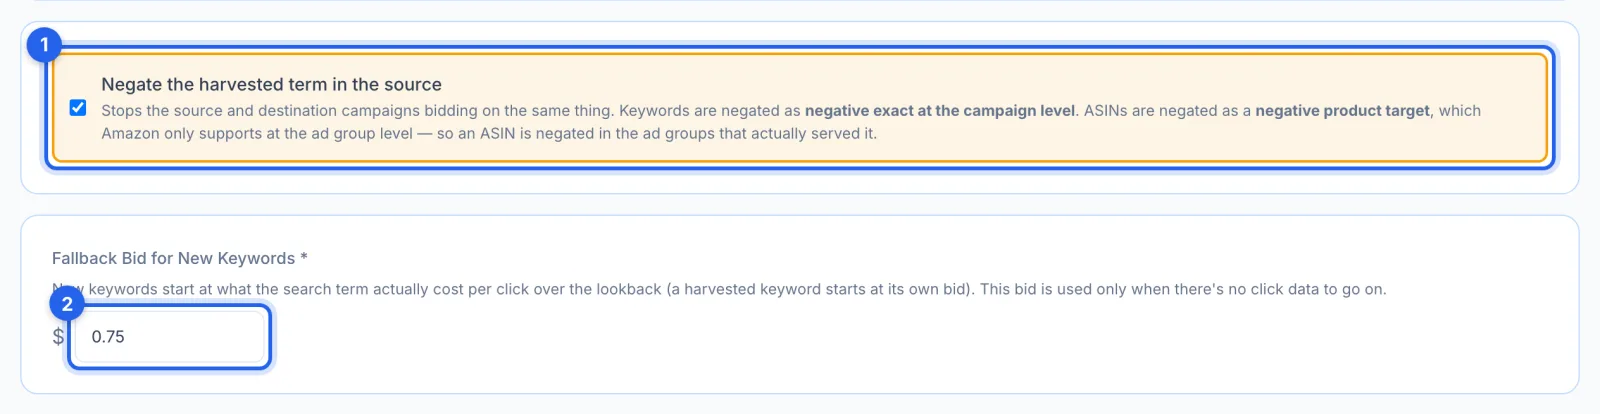
Negate the harvested term in the source (1) is on by default: once the keyword is added, the same search is blocked where it came from, so the two campaigns stop bidding against each other. A keyword is blocked as a negative exact for the whole campaign; an ASIN as a negative product target in the ad groups that served it. A harvested keyword starts at what the search actually cost per click over the lookback; the Fallback Bid (2) is used only when there's no click data.
Step 4 · Choose the destination campaigns
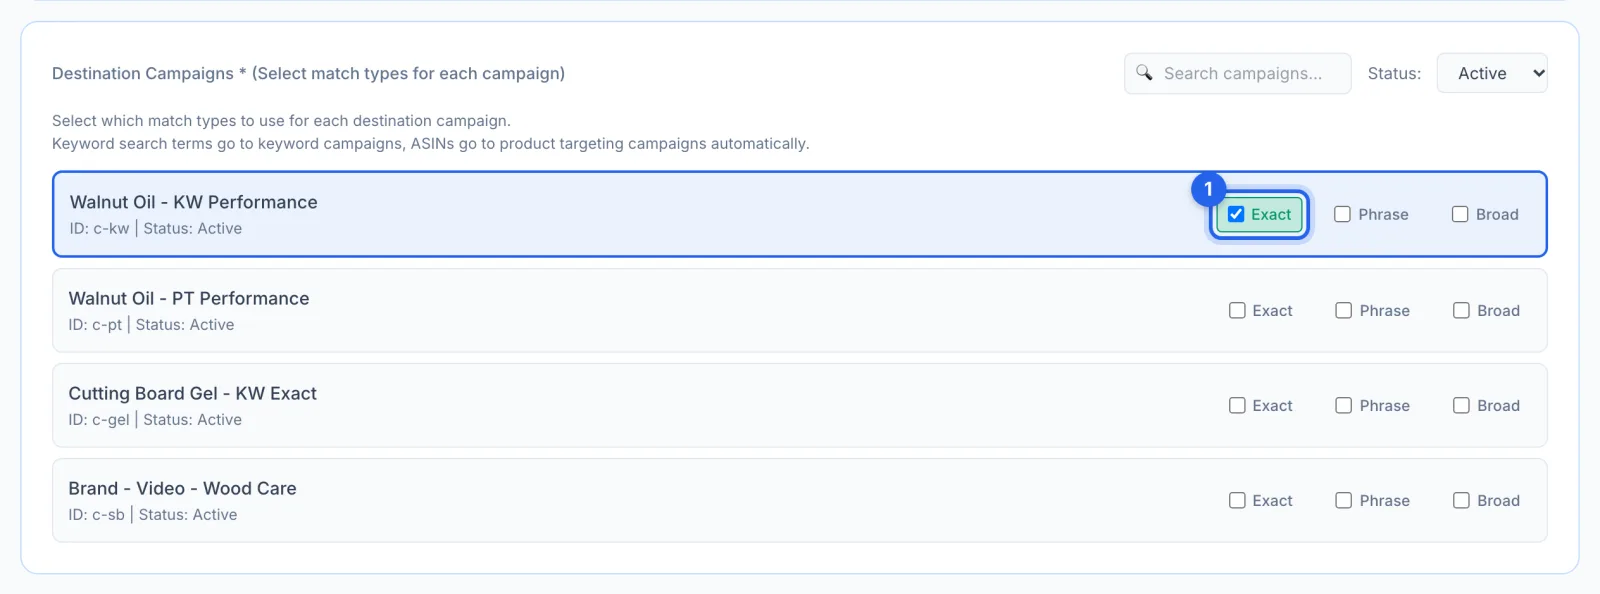
Tick a match type on each campaign that should receive the new keywords (1): Exact, Phrase or Broad. Every campaign and match type you tick makes its own suggestion. Search terms go to keyword campaigns and ASINs to product-targeting campaigns automatically; your source campaigns and auto campaigns aren't listed.
Step 5 · Set the harvest criteria
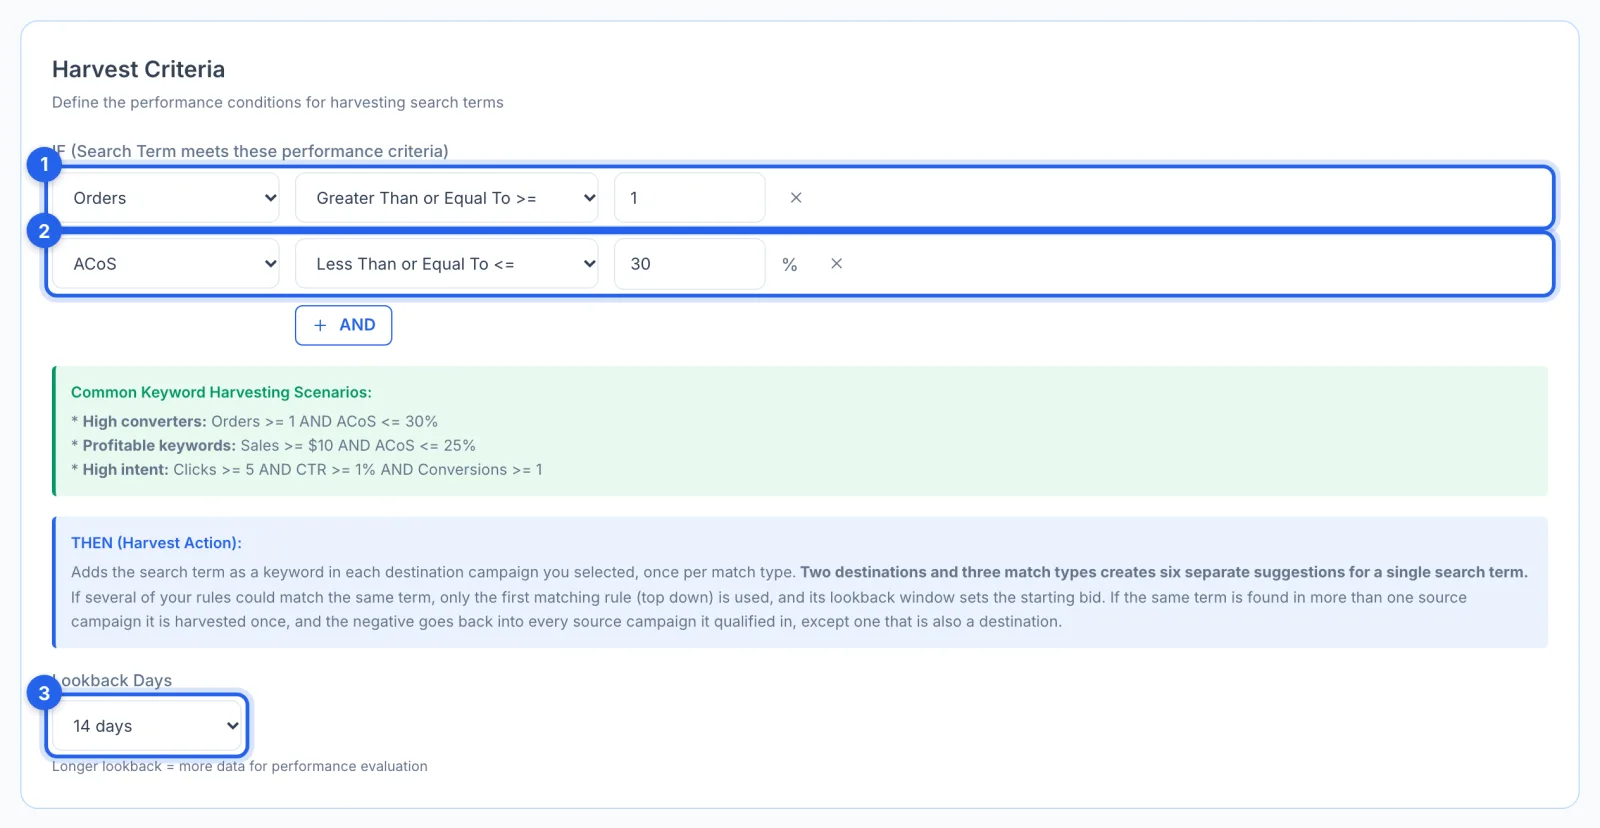
A search is harvested when it meets every condition: Orders of 1 or more by default (1); click AND to add another, such as ACoS of 30% or less (2). Lookback Days (3) is the period it looks at: 7, 14 (the default), 30, 60 or 90 days.
Step 6 · Set the schedule and save
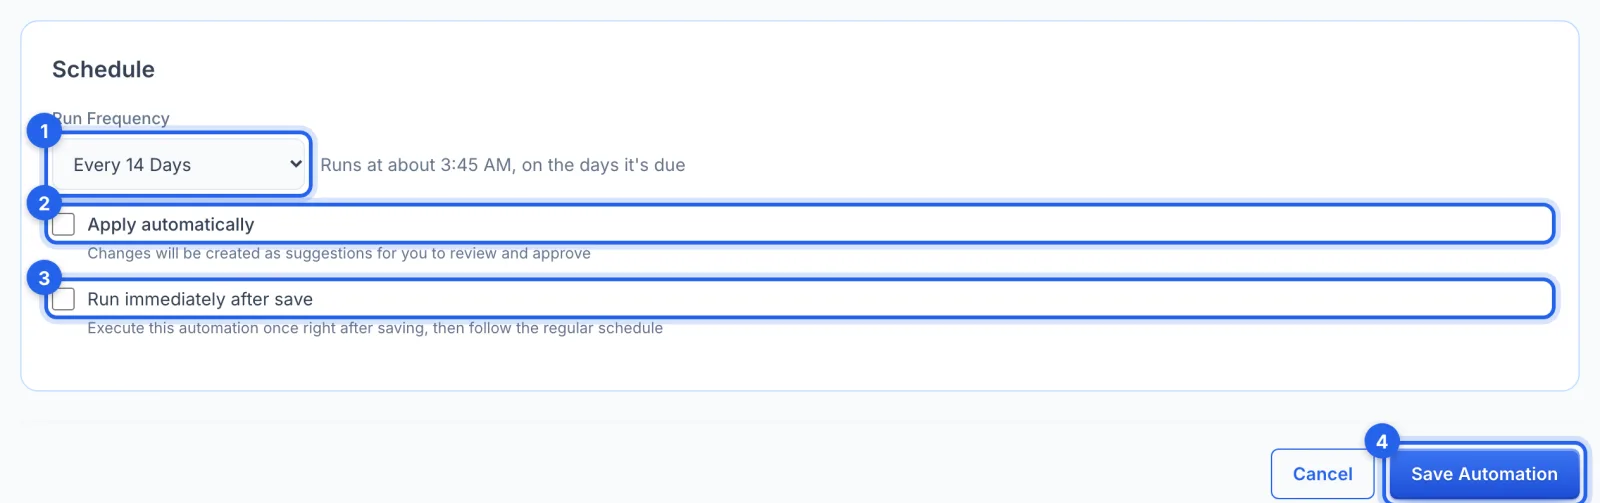
Run Frequency (1) is how often it checks, every 14 days by default; it runs early in the morning on the days it's due, at the time shown beside it on your own clock. Leave Apply automatically (2) off to approve each harvest yourself; tick Run immediately after save (3) for a first run straight away. Click Save Automation (4).
Step 7 · Approve the harvested keywords
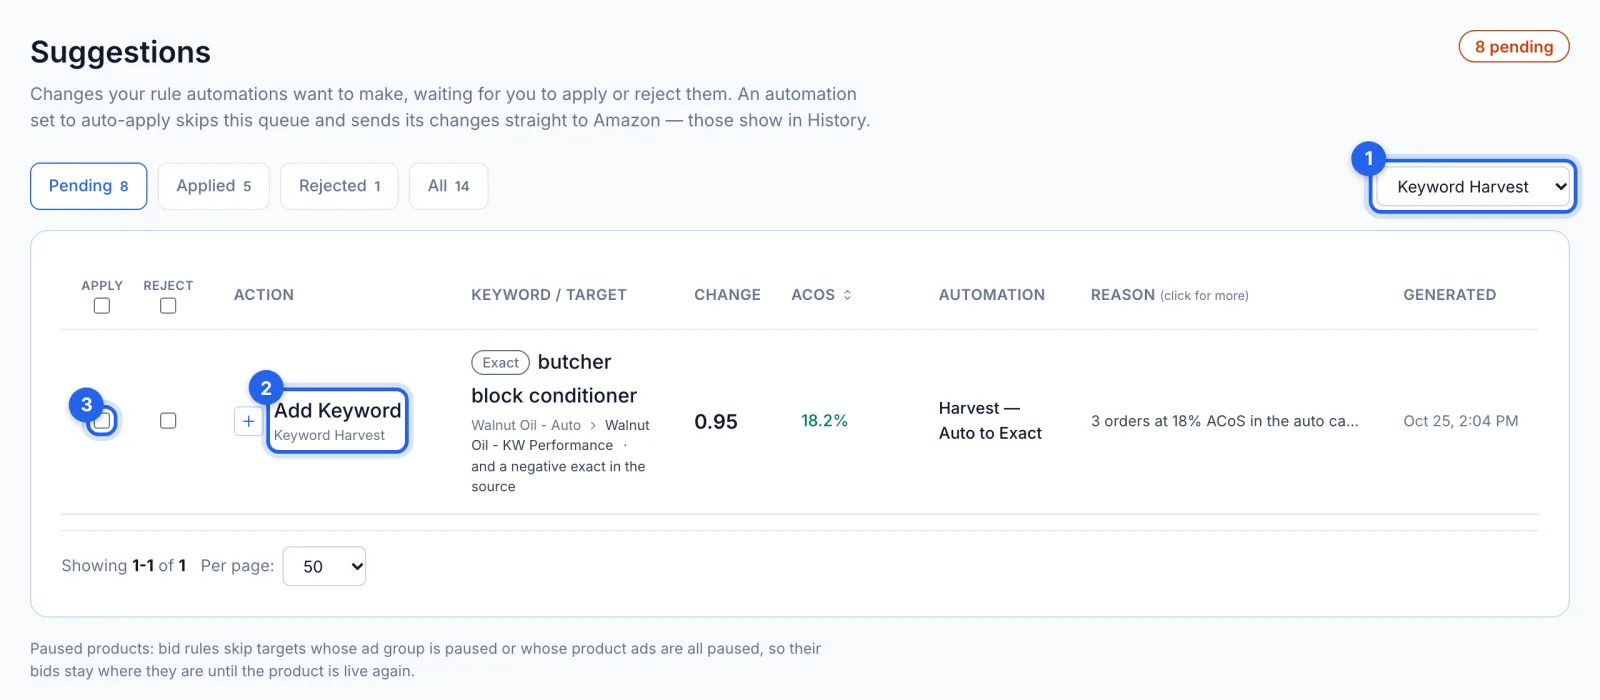
Each harvest waits under To review, Suggestions; filter to Keyword Harvest (1). A row (2) shows the search, where it goes (source › destination), the bid, and "and a negative exact in the source" when the source is blocked too. Tick APPLY (3) and click Apply N selected to send it to Amazon. A suggestion waits 7 days.
Good to know
- What it skips. A search already in the destination as a keyword of that match type, already waiting for you, rejected in the last 14 days, or harvested before; destinations that are paused or archived; and targeting expressions such as categories.
- One search, several sources. A search found in more than one source campaign is harvested once, and the negative goes back into every source it qualified in, except a source that is also a destination.
- Undo. Added keywords and negatives are listed in History without Undo: pause a keyword from its campaign's page, and a negative can only be removed in Amazon's own console.
- The AI can harvest too. An AI profile has its own harvesting, which always waits for your approval (see How to set up AI bid management).
Tips
- The classic pattern: harvest from your auto and broad campaigns into an exact-match campaign, with the negative in the source on.
- Start with Orders of 1 or more and ACoS at or under your target, and keep Apply automatically off until the suggestions look right.